
The Blackboard
Do not cut the two central wires, extract them with vise grips.
Protractor Clock
Blackboard: Imagine if your classroom had a giant, magical tablet that never needed to be plugged in!
Long ago, before iPads existed, students used slates. These were basically flat pieces of a special rock called "slate" (a metamorphic rock that scientists love because it splits into perfect, smooth layers).
Since paper and ink were super expensive back then, kids used these "handheld tablets" and a piece of chalk to do their homework. It was the original "delete button"if you made a mistake, you just wiped it away!
The Ultimate Teacher Workbench
In my classroom, I turned one of these giant stone walls into a high-tech Teachers Workbench. I built a wooden frame over it to hold power tools and design gear. It wasnt just for writing; it was a laboratory!
We used Science to find the best chalk. Did you know chalk is made of calcium carbonate? The old kind was super dusty (achoo!), but the new kind is "low-dust" thanks to some clever chemistry. Id go through over 400 pieces of yellow chalk a year drawing maps and machines!
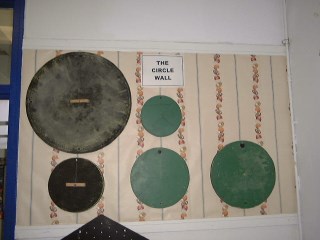
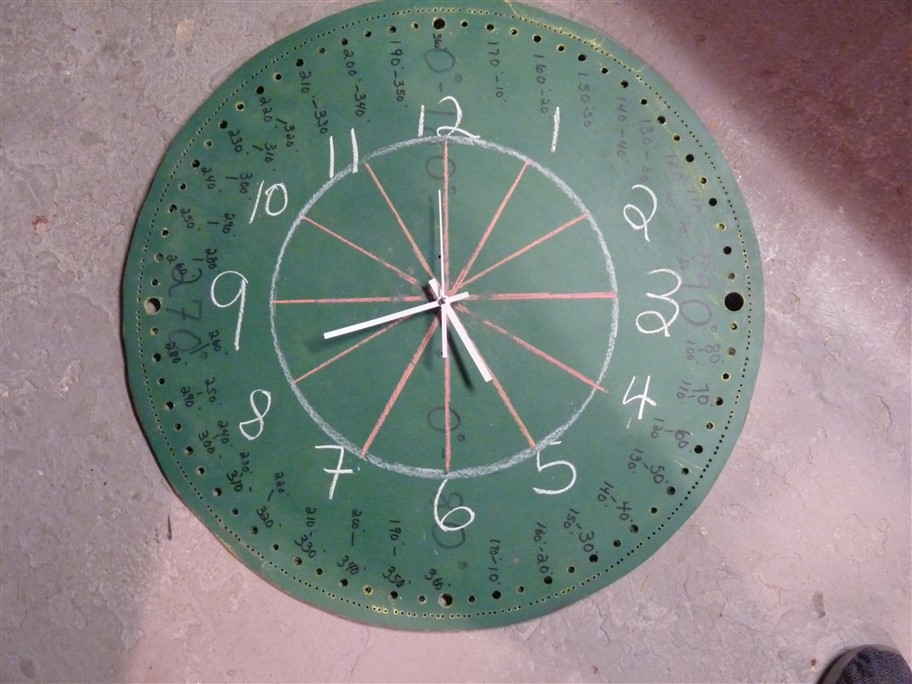
Math in Motion: The Giant Protractor
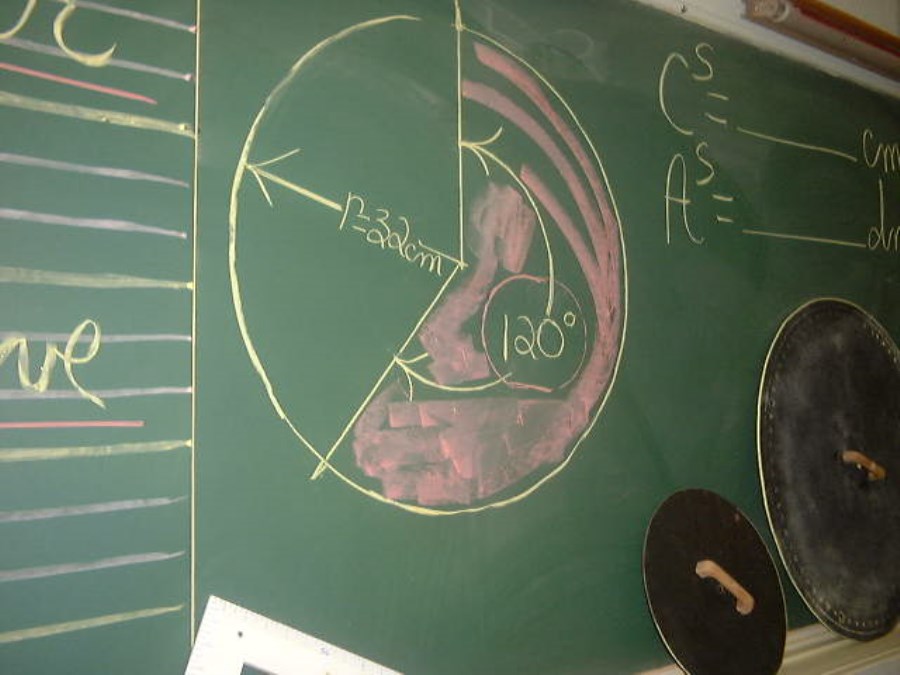
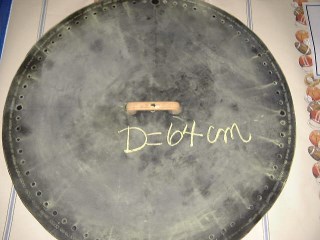
One of my coolest inventions was a giant, circular blackboard wheel. It was 64 centimetres wide. Heres a Math challenge: If you rolled that blackboard like a wheel for one full spin, it would travel exactly 2 metres!
I drilled holes in it to mark the degrees of a circle (360 of them!). Wed take it outside to the pavement and use Technology (like a giant compass called a trammel) to design massive triangles, hexagons, and octagons. It was like drawing giant geometry puzzles on the ground!
The Morning "Engine"
Every night, Id prep the board like a mission control center to get the class "engine" started:
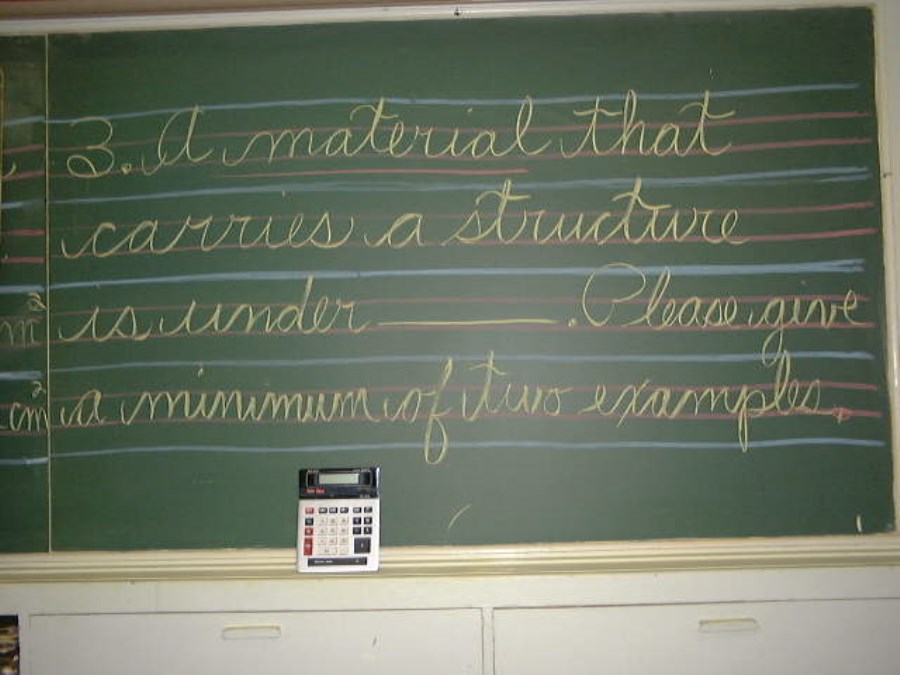
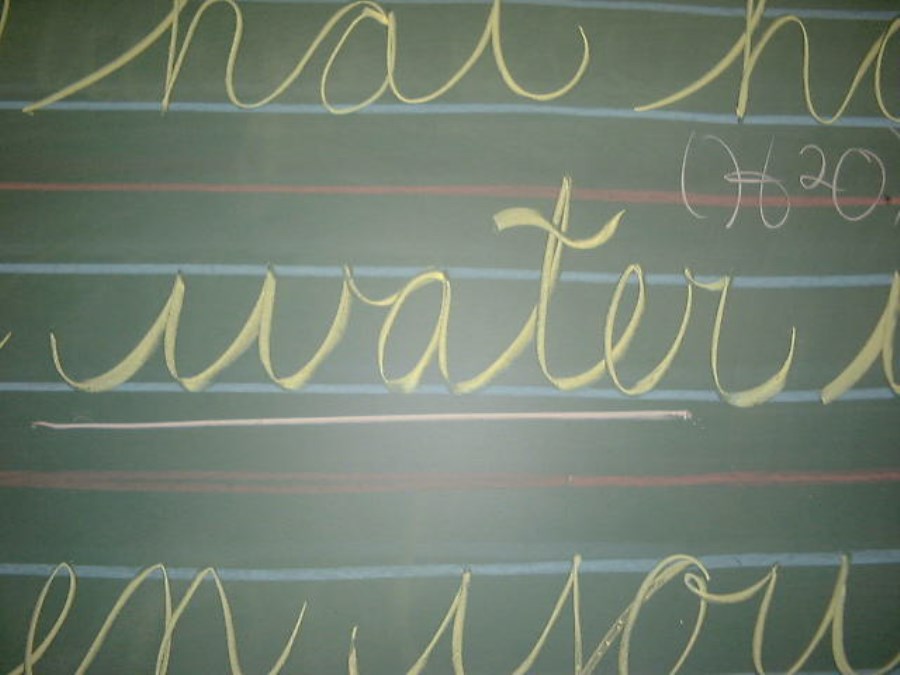
Literacy Tech: I hacked a music tool to draw perfect lines for cursive writing. By using red and blue chalk, I made the board look exactly like the students' notebooks.
The Math Hub: I divided the board into six big squares. Each morning, six students would become the "teachers," using the board to show off their problem-solving skills.
Long ago, before iPads existed, students used slates. These were basically flat pieces of a special rock called "slate" (a metamorphic rock that scientists love because it splits into perfect, smooth layers).
Since paper and ink were super expensive back then, kids used these "handheld tablets" and a piece of chalk to do their homework. It was the original "delete button"if you made a mistake, you just wiped it away!
The Ultimate Teacher Workbench
In my classroom, I turned one of these giant stone walls into a high-tech Teachers Workbench. I built a wooden frame over it to hold power tools and design gear. It wasnt just for writing; it was a laboratory!
We used Science to find the best chalk. Did you know chalk is made of calcium carbonate? The old kind was super dusty (achoo!), but the new kind is "low-dust" thanks to some clever chemistry. Id go through over 400 pieces of yellow chalk a year drawing maps and machines!
Math in Motion: The Giant Protractor
One of my coolest inventions was a giant, circular blackboard wheel. It was 64 centimetres wide. Heres a Math challenge: If you rolled that blackboard like a wheel for one full spin, it would travel exactly 2 metres!
I drilled holes in it to mark the degrees of a circle (360 of them!). Wed take it outside to the pavement and use Technology (like a giant compass called a trammel) to design massive triangles, hexagons, and octagons. It was like drawing giant geometry puzzles on the ground!
The Morning "Engine"
Every night, Id prep the board like a mission control center to get the class "engine" started:
Literacy Tech: I hacked a music tool to draw perfect lines for cursive writing. By using red and blue chalk, I made the board look exactly like the students' notebooks.
The Math Hub: I divided the board into six big squares. Each morning, six students would become the "teachers," using the board to show off their problem-solving skills.