





The Bookmark
Level Up Your Reading: The Ultimate DIY Bookmark Mission!
Our daily "Oral Reading Time" is one of the best parts of our day. But losing your place can totally ruin the vibe.
Think of your bookmark as a tiny GPS for your book. It helps you instantly find the exact spot where you paused reading on your personal data device—which is just a cool, old-school name for your book!
Instead of dog-earing pages—which is like damaging your computer's hardware—a bookmark uses logic and organization to save your progress. It slots right between two pages.
Because it is folded, it splits the closed book open at your exact spot, and depending on which side you hang it, you can find your place instantly. Remember, we always end at the first paragraph of a new page.
If I call on you to read first, you won't glitch out. You’ll be ready to go in 0.5 seconds. That is maximum efficiency and confidence! "Just don't kid yourself; this is a lot harder to make properly than you think!"
Our daily "Oral Reading Time" is one of the best parts of our day. But losing your place can totally ruin the vibe.
Think of your bookmark as a tiny GPS for your book. It helps you instantly find the exact spot where you paused reading on your personal data device—which is just a cool, old-school name for your book!
Instead of dog-earing pages—which is like damaging your computer's hardware—a bookmark uses logic and organization to save your progress. It slots right between two pages.
Because it is folded, it splits the closed book open at your exact spot, and depending on which side you hang it, you can find your place instantly. Remember, we always end at the first paragraph of a new page.
If I call on you to read first, you won't glitch out. You’ll be ready to go in 0.5 seconds. That is maximum efficiency and confidence! "Just don't kid yourself; this is a lot harder to make properly than you think!"
Let's Get Started
Bookmark Design
.
The Homework Assigmment
Let’s talk about the first homework you have to do when you get home. The word "homework" is a compound noun. A compound noun is made by joining two smaller words together to make a brand-new word. In this case, you take home and join it with work to get homework. Homework is an uncountable noun. Find out what an uncountable noun is?
You have an organizational task ahead of you that will go on for the whole of the school year. This is an excellent homework assignment because it teaches you real-life skills that you will use forever.This project turns you into a team leader for your home.
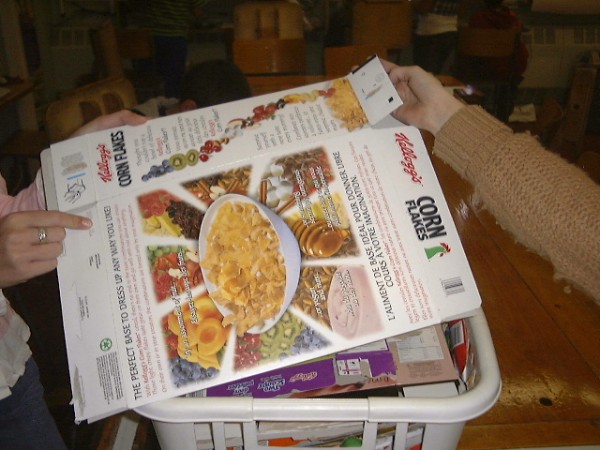
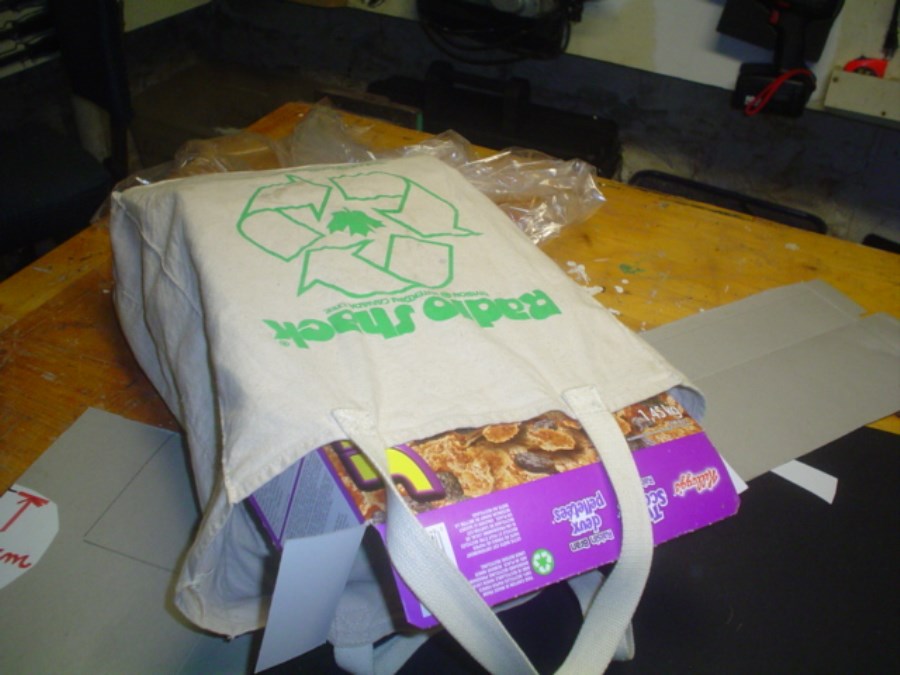
Your assignment is to organize everyone in your family to help you. You and your family need to carefully break down cereal boxes and create a logical system to temporarily store the flattened out boxes in a cloth recyclable shopping bag. The bag should have a special hanging place in your home. Cloth bags are far superior because they fold into any shape, roll up like a small sock, and can squeeze it into your backpack. Your bag should have your name on it.
This is how you are going to make this project super easy, follow these quick steps: Make a Sign: Tape a note to the kitchen counter or recycling bin that says: "Save cereal boxes for my school project!"
The "Pop and Flatten" Method: Open both the top and bottom flaps of the box. Collapse the box flat, then slip it into your bag. It takes up almost no space in your shopping bag.
Set a Calendar Reminder: Put a reminder on the fridge or on a family calendar for the exact day you need to bring the bag to school.
When your bag gets full you will need to carry it to school and put your collected cereal boxes (boxboard) into the classroom’s boxboard hamper. Remember, this assignment teaches you about geometry: Flattening a 3D box into a 2D shape helps your brain understand how shapes and space work. We are going to be talking about this a lot this year.
The Grid

90 degrees
1cm
1cm
One square centimeter



19cm
28cm
"What you are looking at is a grid sheet with one-centimeter squares. I use this paper every day to plan my building projects. Yesterday, I needed to make a small table on wheels for my house.
I grabbed my clipboard, drew a plan on the grid paper, and used my tape measure to measure the size I needed to make. Those simple tools made my job super easy!”
Learning how to use this grid will change how you think. You will stop just doing math on paper and start thinking like a real mathematician!
Arithmetic vs. Mathematics
Arithmetic is just calculating numbers to find an answer.
Mathematics is exploring how shapes, lines, and spaces work together.
Your Goal: Design a Bookmark
We are going to use this grid to explore two-dimensional shapes. You will use the grid squares to design and cut out a bookmark of a specific size.
I grabbed my clipboard, drew a plan on the grid paper, and used my tape measure to measure the size I needed to make. Those simple tools made my job super easy!”
Learning how to use this grid will change how you think. You will stop just doing math on paper and start thinking like a real mathematician!
Arithmetic vs. Mathematics
Arithmetic is just calculating numbers to find an answer.
Mathematics is exploring how shapes, lines, and spaces work together.
Your Goal: Design a Bookmark
We are going to use this grid to explore two-dimensional shapes. You will use the grid squares to design and cut out a bookmark of a specific size.

The Blueprint
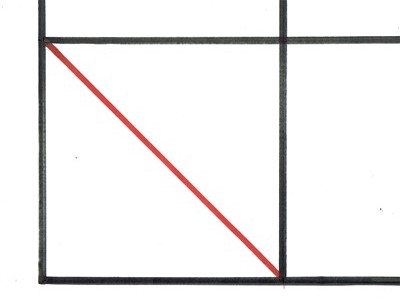







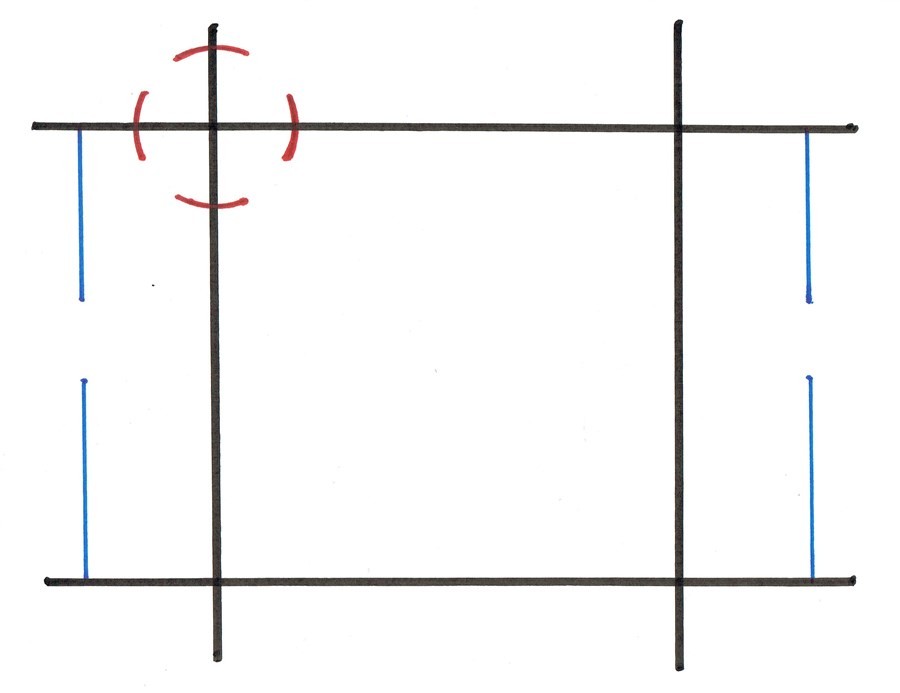
The Distance from one extension line to the other is 20cm.
5cm
Diagonal miter cut
Note: Under Construction


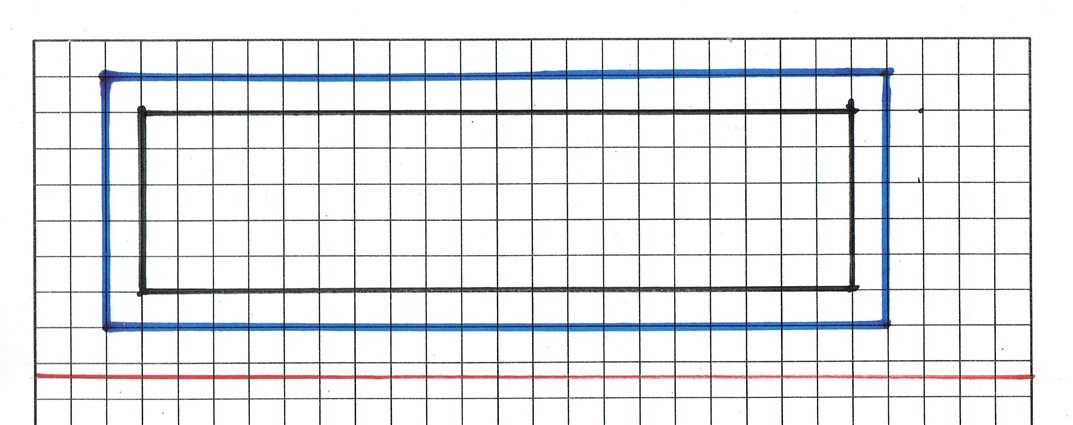
Don't worry about the new words! We'll get to them. Here is exactly what they mean and how to construct your project step-by-step.You need to design and construct a bookmark 20cm X 5cm. That's the blue area of the plan and that's what we call a blueprint. The bookmark will fold at the 5cm mark and have four mitered corners made with a diagonal miter cut on each corner.

Fold
Draw Your Blueprint
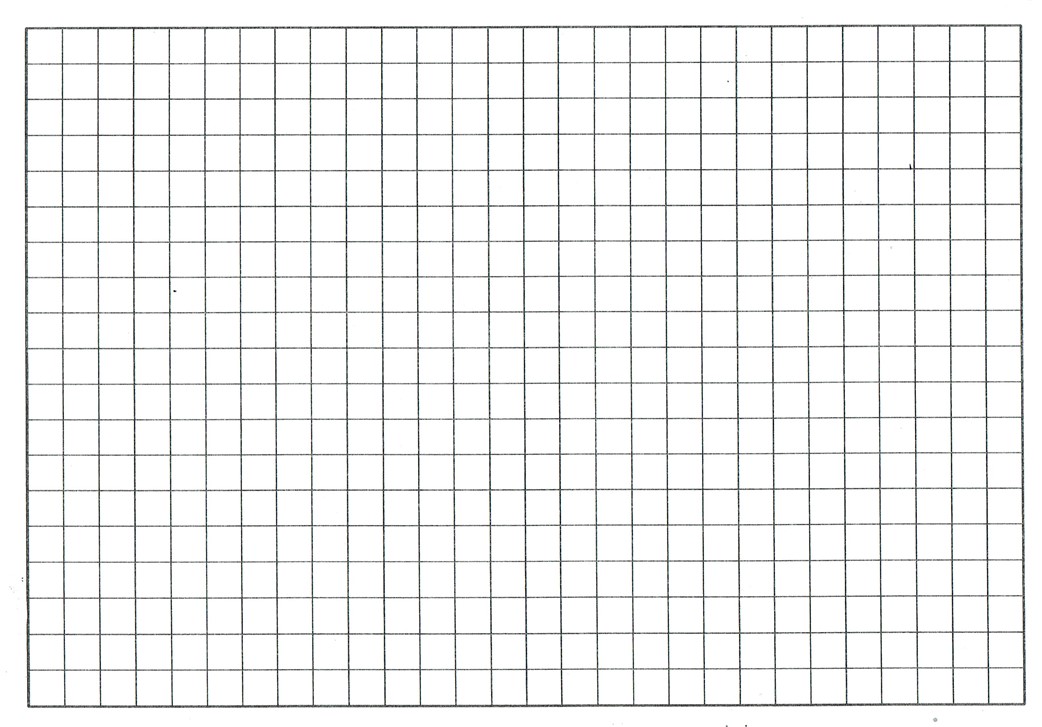
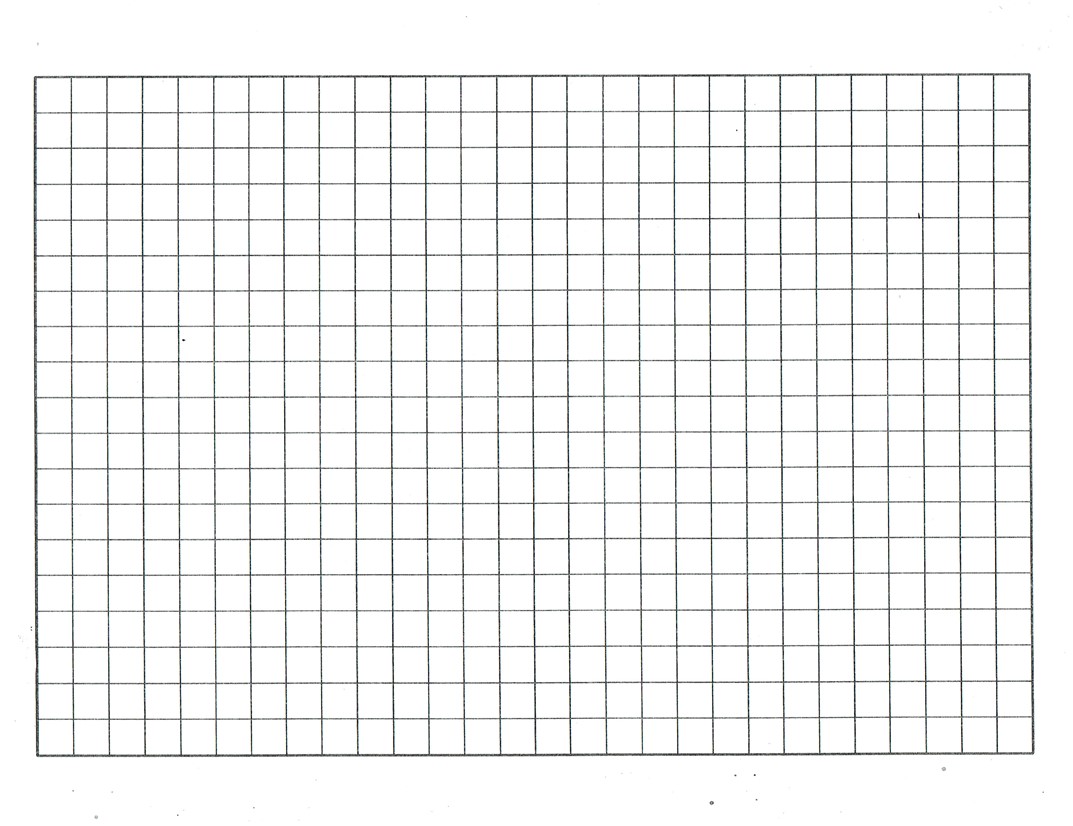
This is the graph sheet you are going to draw your plan on. To make your bookmark, you need a plan because it prevents mistakes and ensures your bookmark fits your books perfectly. A grid paper makes this easy because each square is exactly (1cm wide and 1cm tall) so you can just count the squares instead of using a ruler.
This is the graph sheet you are going to draw your plan on. To make your bookmark, you need a plan because it prevents mistakes and ensures your bookmark fits your books perfectly. A grid paper makes this easy because each square is exactly (1cm wide and 1cm tall) so you can just count the squares instead of using a ruler.
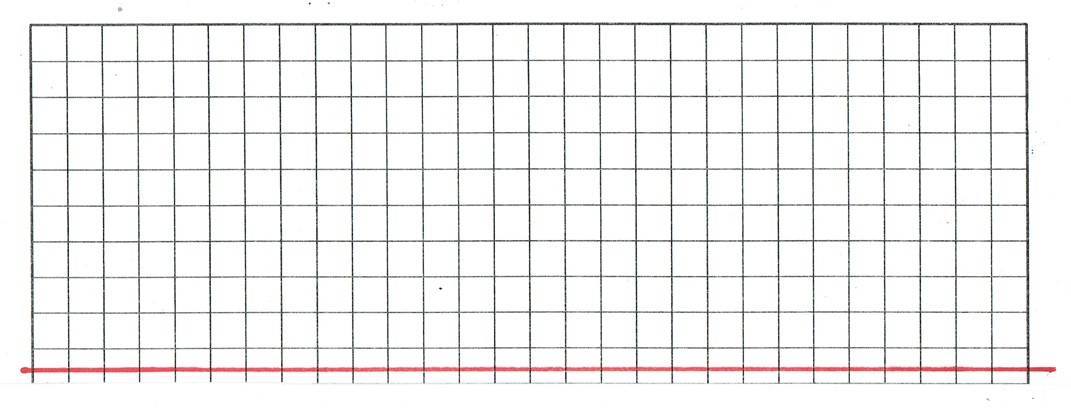
Cut the sheet in half horizontally because one half is all you will need. You can use the other half later or share it with a friend. Using only what you need is good for the environment.
Count the Width: Find a starting point on your grid paper and count (20), starting with zero, going sideways (horizontally).
Count the height: From that same starting point, count (5) squares going down (vertically).
Connect the Dots: Use a pencil and a ruler to draw straight lines connecting your marks forming a rectangle.
Count the height: From that same starting point, count (5) squares going down (vertically).
Connect the Dots: Use a pencil and a ruler to draw straight lines connecting your marks forming a rectangle.

Design and Cutting to Rough Size, The Blue Lines
Cutting a material to rough size means cutting a piece that is slightly larger than your final project needs to be. In this case a 1cm margin around the perimeter.
You do this to give yourself extra room for mistakes, trimming, and final adjustments.
For this project where we are making bookmarks you draw a blueprint that includes the size of the rough cut boxboard you will need. Remember to save the unused portion for future use.
This is Why We Cut to Rough Size First!
Room for Mistakes: If your final bookmark needs to be exactly 5cm X 20cm, it is hard to cut it perfectly on the first try. You need to practise by cutting the blue rough size.
Easier to Handle: A huge, whole cereal box is awkward to work with. Cutting a smaller, "rough" chunk out of it makes it much easier to measure and trace.
The "Safety Margin": Your 7cm X 22cm piece of boxboard is the rough size. It is a little bit wider and longer than your actual 5cm X 20cm blueprint so you have a safe background to work on.
Rough Size vs. Final Size
Rough Size: The oversized piece you start with (your 7cm X 22cm boxboard). It does not need to have perfectly straight edges yet but do your best in cutting with scissors. Practice makes perfect.
Final Size: The exact, perfect dimensions of your finished project (your 5cm X 20cm bookmark). This is the size you get after you do your neat, precise transfer of your grid from your blueprint to your bookmark surface. That is the task you will have after you cut your rough size, center and tape your cut blue print to the surface of your rough cut.
Cutting a material to rough size means cutting a piece that is slightly larger than your final project needs to be. In this case a 1cm margin around the perimeter.
You do this to give yourself extra room for mistakes, trimming, and final adjustments.
For this project where we are making bookmarks you draw a blueprint that includes the size of the rough cut boxboard you will need. Remember to save the unused portion for future use.
This is Why We Cut to Rough Size First!
Room for Mistakes: If your final bookmark needs to be exactly 5cm X 20cm, it is hard to cut it perfectly on the first try. You need to practise by cutting the blue rough size.
Easier to Handle: A huge, whole cereal box is awkward to work with. Cutting a smaller, "rough" chunk out of it makes it much easier to measure and trace.
The "Safety Margin": Your 7cm X 22cm piece of boxboard is the rough size. It is a little bit wider and longer than your actual 5cm X 20cm blueprint so you have a safe background to work on.
Rough Size vs. Final Size
Rough Size: The oversized piece you start with (your 7cm X 22cm boxboard). It does not need to have perfectly straight edges yet but do your best in cutting with scissors. Practice makes perfect.
Final Size: The exact, perfect dimensions of your finished project (your 5cm X 20cm bookmark). This is the size you get after you do your neat, precise transfer of your grid from your blueprint to your bookmark surface. That is the task you will have after you cut your rough size, center and tape your cut blue print to the surface of your rough cut.
Measuring Black Lines