Making Bookmark Two
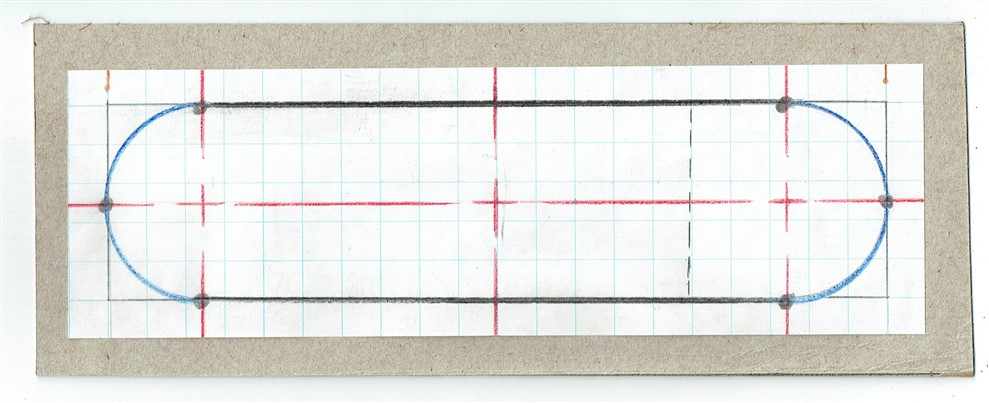
Start with a piece of boxboard 9cm X 24cm. Center and reverse tape your blueprint onto the boxboard exactly the same way you did Bookmark One.
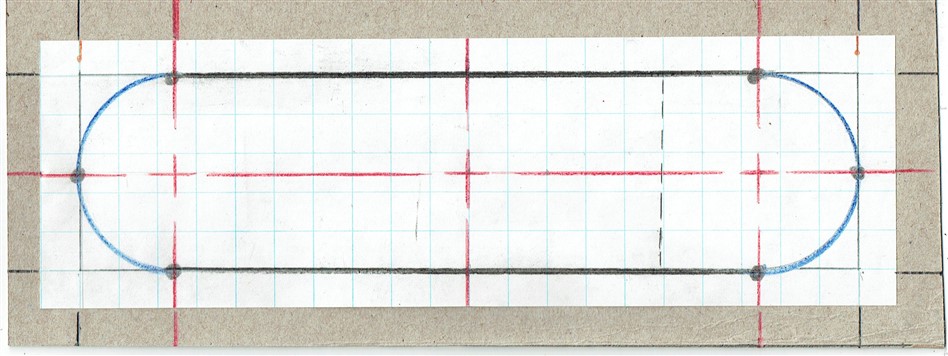
Now it’s time to transfer your plan to the boxboard. Use your black pencil for the straight top and bottom lines of your drawing. These straight lines show where the flat, steady walls of your project will be.
Because black is nice and dark, it stands out perfectly against the boxboard material. This makes it super easy for you to see the main shape of your project and know exactly where the straight parts start and stop.
Use your red pencil for the cross-marks and the curved semi-circles at the ends. The red cross-marks look like targets, and they show you exactly where to place your circle template so your curves come out perfect.
The bright red color acts like a warning sign for your brain, reminding you that these specific areas need to be smooth, rounded turns instead of straight lines.
Using two different colors is just like using a map for your project. If every single line was the same color, it would be very easy to get confused and accidentally cut or fold the wrong part.
The black lines tell you to "go straight," while the red lines tell you to "get ready to turn." Following this color guide helps you avoid mistakes so your boxboard project comes together perfectly.
Because black is nice and dark, it stands out perfectly against the boxboard material. This makes it super easy for you to see the main shape of your project and know exactly where the straight parts start and stop.
Use your red pencil for the cross-marks and the curved semi-circles at the ends. The red cross-marks look like targets, and they show you exactly where to place your circle template so your curves come out perfect.
The bright red color acts like a warning sign for your brain, reminding you that these specific areas need to be smooth, rounded turns instead of straight lines.
Using two different colors is just like using a map for your project. If every single line was the same color, it would be very easy to get confused and accidentally cut or fold the wrong part.
The black lines tell you to "go straight," while the red lines tell you to "get ready to turn." Following this color guide helps you avoid mistakes so your boxboard project comes together perfectly.