


One Decimeter
A
B
C
D


Let's Learn all About How to Make a Cube!
The Square Decimeter
Step 2: Tech & Tools (The Science of Building)
To make a cube, we need Volume. A cube has height, width, and depth. That's volume.
Recycle & Reuse: Grab some cardboard. Shoe box cardboard is the best for this job but you can substitute boxboard, (cereal box). Shoe box cardboard is a great building material because it's sturdy but easy to cut.
The Template: Use a "Square Decimeter" template (10cm x 10cm). Cut six of them. If you make a mistake recycle your square and make a new one.


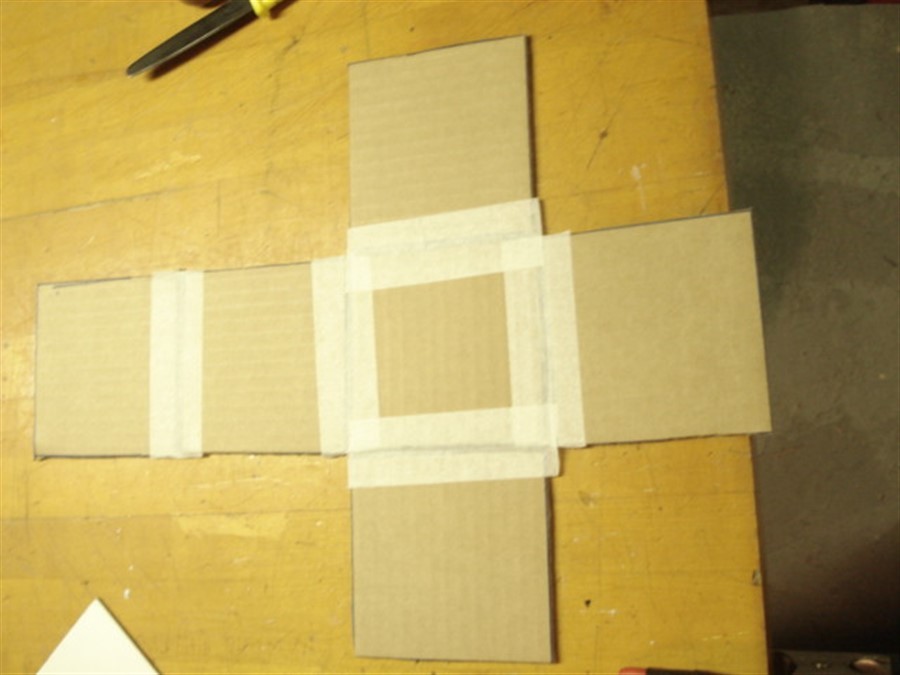
Focus on the 6 (1dm X 1dm) templates. They are attached together with 5cm wide masking tape.
Action
Time to put this cube together. To assemble the cube you will need scissors, masking tape and a 3mm spacer.
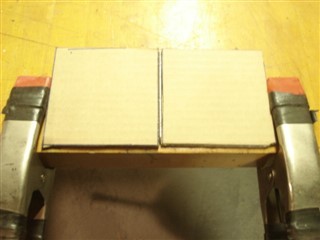
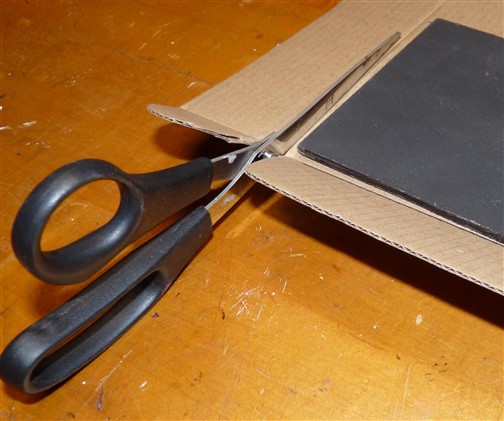
If you focus on the left side of the above photo, you will notice a large nail between the two pieces of cardboard. That is a spacer. It is there to make bending the cardboard easier.
On the right side is the masking tape sticking to a joint ready to be cut with a pair of scissors. Having a buddy do this job makes the task much easier. You can share the work.
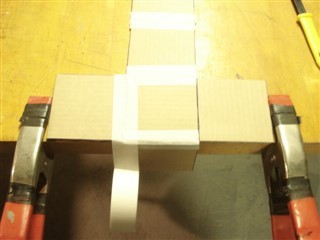
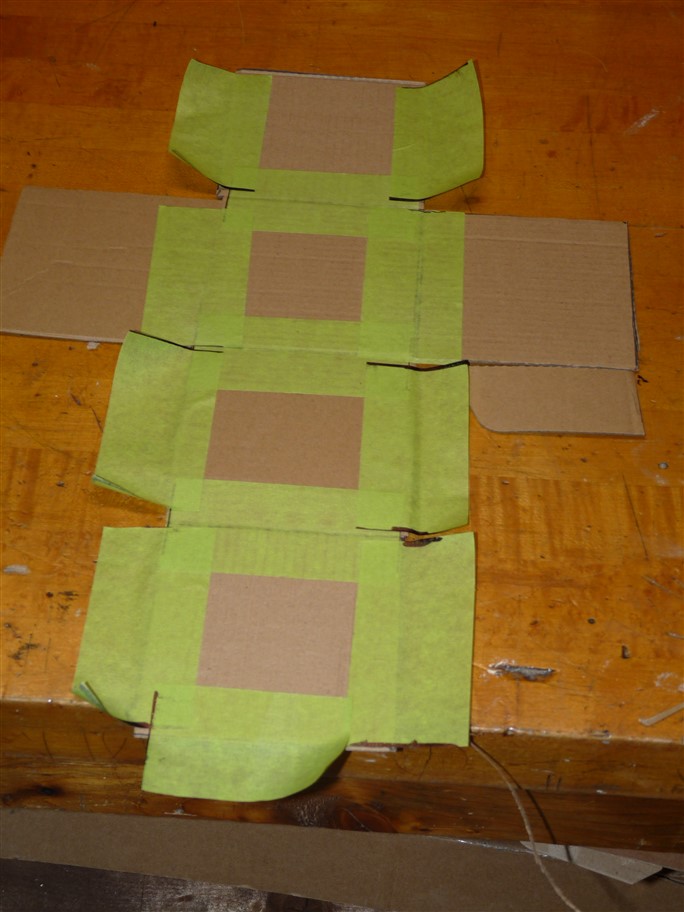
The big photo shows how the six parts fit together in a plan.
The last small photo shows how the parts are taped together. Good Luck!
If you focus on the left side of the above photo, you will notice a large nail between the two pieces of cardboard. That is a spacer. It is there to make bending the cardboard easier.
On the right side is the masking tape sticking to a joint ready to be cut with a pair of scissors. Having a buddy do this job makes the task much easier. You can share the work.
The big photo shows how the six parts fit together in a plan.
The last small photo shows how the parts are taped together. Good Luck!
The Cube
Hey there, future inventors! Ready to build something awesome? Check out this secret mission: turning a flat piece of cardboard into a 3D Cubic Decimeter!
The "Super-Square"
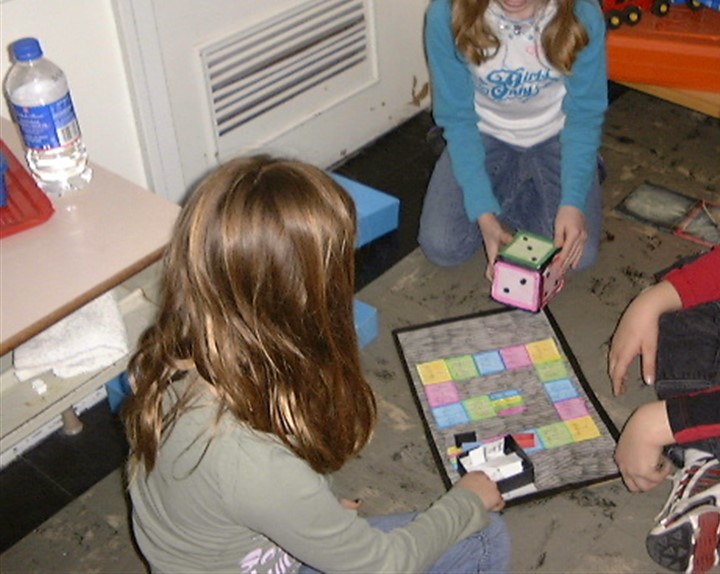
Two of my students started with one cardboard square decimeter. They each made five more identical squares and turned those squares into a cubes then into a math game for first gradersteaching them adding and subtracting with a giant, homemade die! Now, it's your turn to be the engineer.
The "Super-Square"
Two of my students started with one cardboard square decimeter. They each made five more identical squares and turned those squares into a cubes then into a math game for first gradersteaching them adding and subtracting with a giant, homemade die! Now, it's your turn to be the engineer.
Step 1:
The Secret Geometry Code
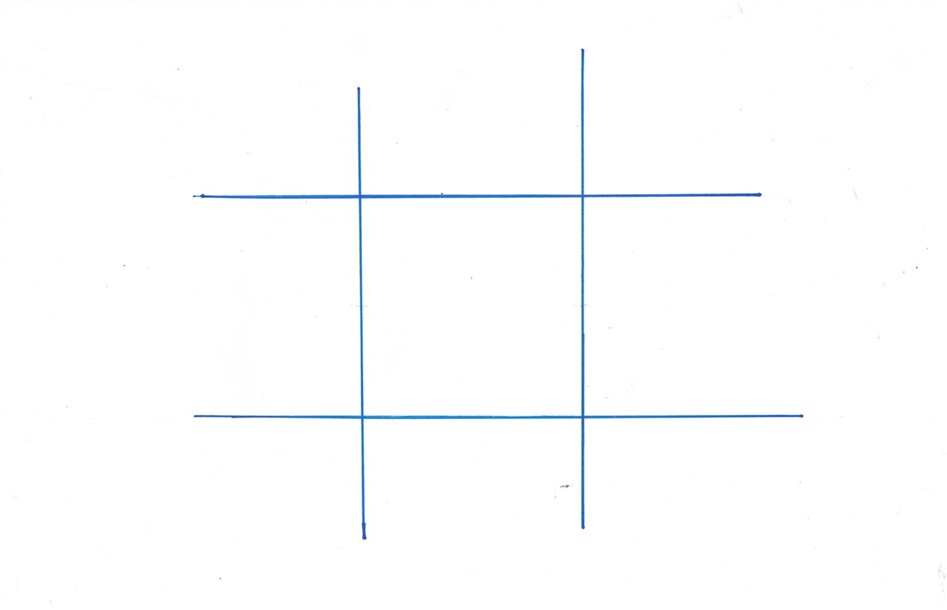
Before we build, we need to know the "Blueprint Basics."Intersecting Lines: These are lines that cross over each other (like a giant plus sign).
The Right Angle: Look at the corner of a square. That L-shape is a 90-degree angle. Its the "perfect corner" that keeps your cube from looking like a squashed sandwich.
The Polygon: When four equal sides meet at right angles, you get a Square.The Decimeter (dm): This is your magic unit of measurement! A Decimeter is 10 centimetres longabout the size of a yummy slice of cheese.
The Secret Geometry Code
Before we build, we need to know the "Blueprint Basics."Intersecting Lines: These are lines that cross over each other (like a giant plus sign).
The Right Angle: Look at the corner of a square. That L-shape is a 90-degree angle. Its the "perfect corner" that keeps your cube from looking like a squashed sandwich.
The Polygon: When four equal sides meet at right angles, you get a Square.The Decimeter (dm): This is your magic unit of measurement! A Decimeter is 10 centimetres longabout the size of a yummy slice of cheese.
Under Construction
This is a simple square decimeter blueprint. A blueprint is a plan on paper.
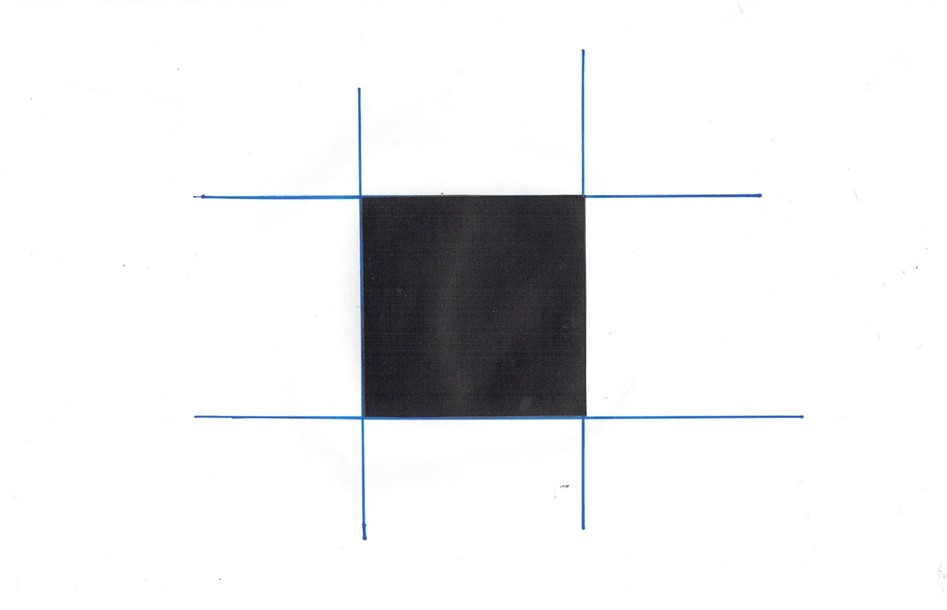
This is a square decimeter template.
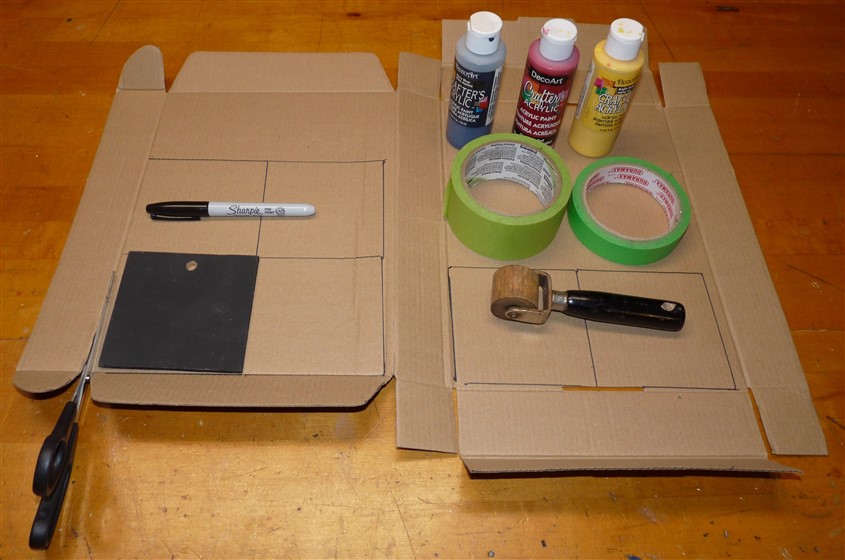
Basic Tools and Materials You Will Need to do the Job

Making a Cubic Decimeter
Practicing with scissors is a great way to level up your artisan hand skills! Even at your age, cutting different materials helps you master fine motor control.
This is the same "finger power" you need for everything from writing neatly to playing a keyboard.
Here is why practicing with different materials is so helpful:
It Builds "Hand Power".
Different materials require different amounts of strength. Cutting thin paper is easy. Cutting through cardboard builds the tiny muscles in your palms. This strength keeps your hands from getting tired when you practice your scales on the keyboard.
It Teaches "Bilateral Coordination".
These are big words, but they just mean "using both hands at once for different jobs." When you cut, one hand controls the scissors while the other hand steers the material.
You use this same teamwork when you fix a bike. One hand holds the seat steady while your other hand uses a wrench to tighten the nut.
It Sharpens Your Focus
Cutting complex shapes or tough materials requires you to plan ahead and stay concentrated. This helps you get better at sequencing.
Sequencing means figuring out the right order of steps to finish a project, which is a big deal in building technology.
It Improves Hand-Eye Coordination.
Scientists know that your eyes must track the line while your hand moves the scissors.
Mastering this helps with other fun activities, like constructing a cube to make a game. You are learning model building, which is a great artisan skill!
Form a "Net"
In math, a net is what a 3D shape looks like if you unfold it and lay it flat. A cubic decimeter has 6 flat sides (faces), so its net looks like 6 squares that make the shape of a cross.
Putting it together
When you have a net made of 6 squares, and each square is 1 decimeter on each side, you have a six square decimeter net.
When you fold this net along the edges, it creates a cube. Because each of the 6 sides has an area of 1 square decimeter surface area of the cube is exactly 6 square decimeters. Now its time to tape the six individual squares and attach them together.
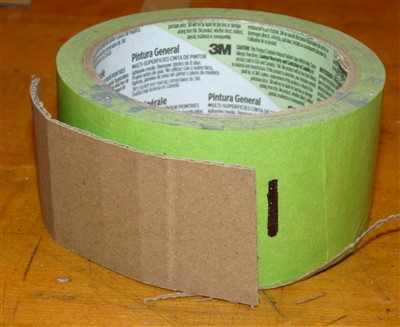
Each piece of masking tape is approximately 10cm long.