

Designing Bookmark Two
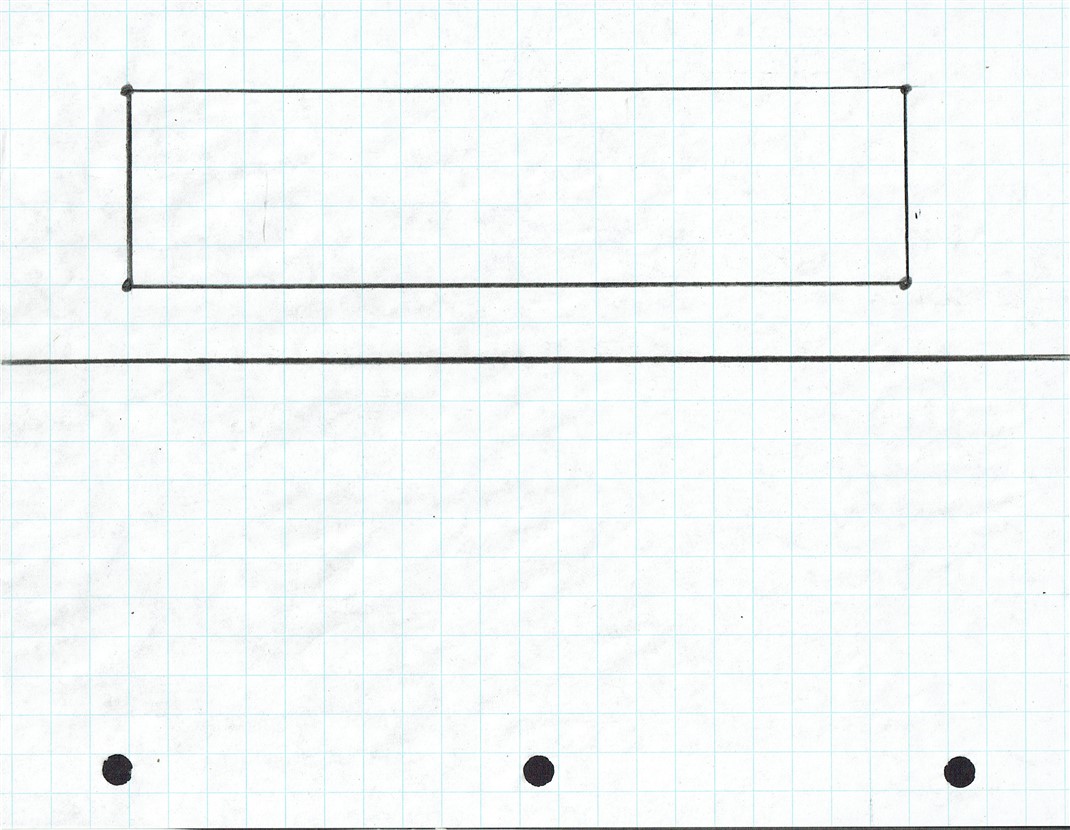
You should already be very familiar with this rectangle! It is the starting point for your Bookmark One blueprint. Bookmark Two begins exactly the same way. It is the exact same size, and you will draw it on the same sheet of 1cm grid paper.
Finding the Absolute Centers
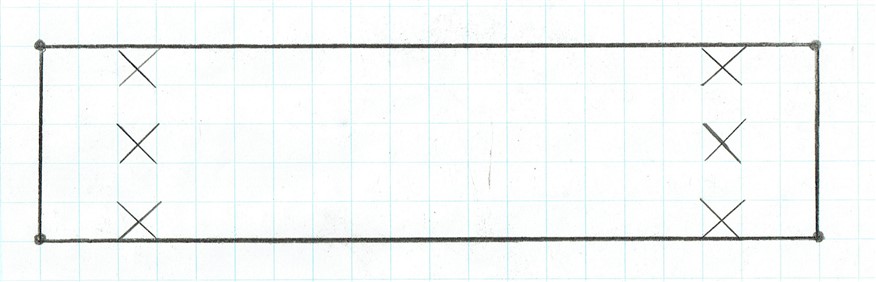
Carefully and precisely draw the rectangle and then draw the 12 diagonal lines on the six squares, just like in the diagram.When you draw shapes by hand, your eyes can easily trick you into guessing the wrong middle point.
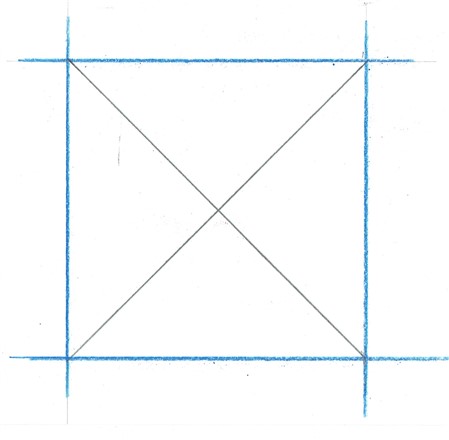
But squares are special! A square has perfectly equal sides, which means it is completely symmetrical. When you draw diagonal lines from corner to corner inside a square centimeter, you create a perfect "X." That "X" marks the exact, mathematical center of each square—no guessing needed.
But squares are special! A square has perfectly equal sides, which means it is completely symmetrical. When you draw diagonal lines from corner to corner inside a square centimeter, you create a perfect "X." That "X" marks the exact, mathematical center of each square—no guessing needed.
Center Lines
Let’s switch to a sharp, red pencil crayon. I am focusing on the word sharp because a fine point allows you to make a precise, clean, and detailed drawing. To get that perfect tip, you will need to use a sharpener.
Did you know a pencil sharpener works exactly like a woodworking hand plane? Both tools use a sharp blade set at a precise angle to shave away thin, curled ribbons of wood. A woodworker slides a plane along a flat board to smooth it, while you twist a pencil to shave it into a cone. Both use the exact same cutting action! If your sharpener is dull and chewing up the wood, make sure to get a new one.
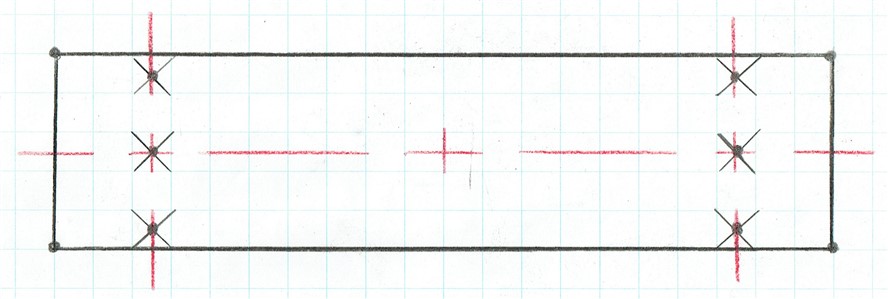
We are using a red pencil crayon so your new lines stand out clearly. It will contrast with the black lines already on your page, which show the rectangle's perimeter and the square's diagonal lines. You will use the red crayon to draw the centering lines from the diagram. Notice that these lines are not solid—they are broken into short and long dashes!
Did you know a pencil sharpener works exactly like a woodworking hand plane? Both tools use a sharp blade set at a precise angle to shave away thin, curled ribbons of wood. A woodworker slides a plane along a flat board to smooth it, while you twist a pencil to shave it into a cone. Both use the exact same cutting action! If your sharpener is dull and chewing up the wood, make sure to get a new one.
We are using a red pencil crayon so your new lines stand out clearly. It will contrast with the black lines already on your page, which show the rectangle's perimeter and the square's diagonal lines. You will use the red crayon to draw the centering lines from the diagram. Notice that these lines are not solid—they are broken into short and long dashes!
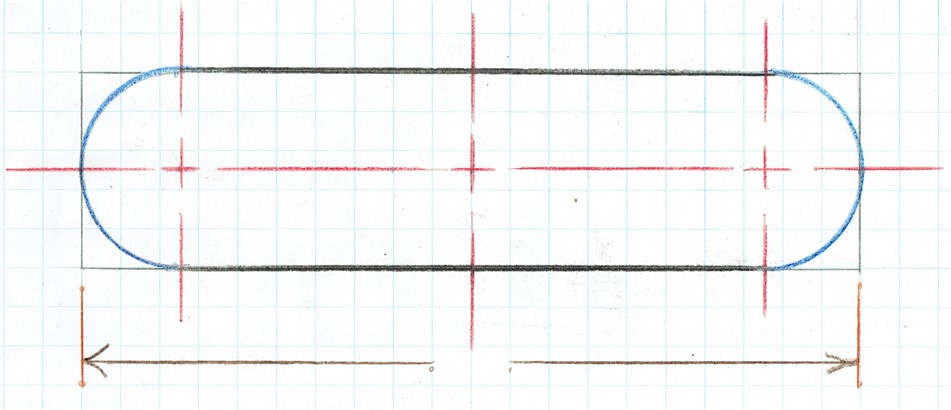
Drawing the Semi-circles
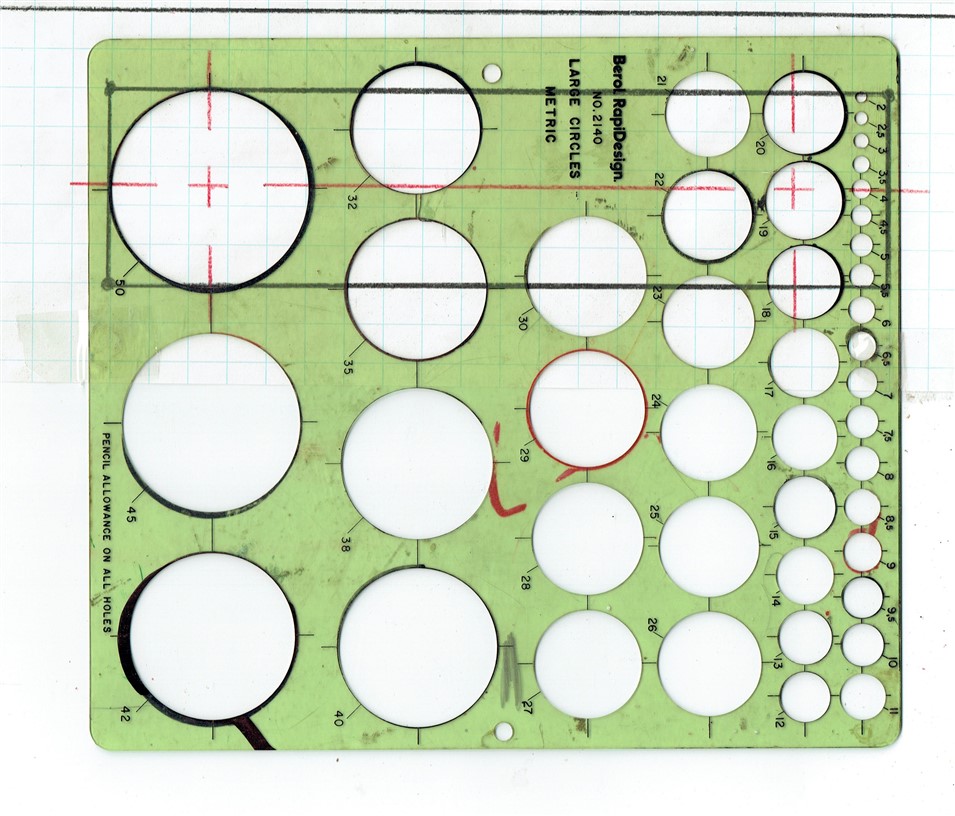
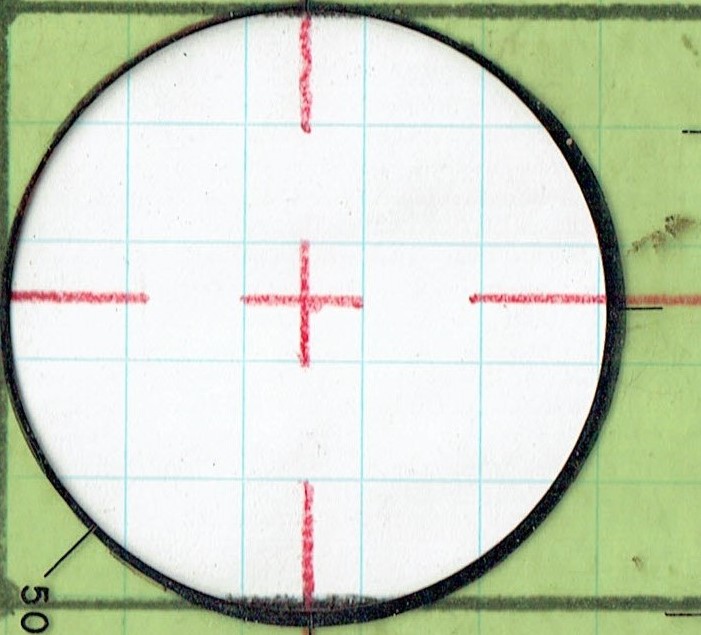
Center lines are the secret map for your geometric designs. When drawing a semi-circle, grab your sharp blue pencil crayon and find the 50mm circle on your template.
Align the template's tick marks perfectly with the center lines you already drew. These lines cross at the exact middle point, showing your eyes where the shape balances so it stays perfectly round instead of looking like a lumpy egg.
Because a semi-circle is exactly half of a circle, the straight horizontal center line acts as a built-in baseline—telling your pencil exactly where to start curving and where to stop so your drawing never ends up crooked.
Align the template's tick marks perfectly with the center lines you already drew. These lines cross at the exact middle point, showing your eyes where the shape balances so it stays perfectly round instead of looking like a lumpy egg.
Because a semi-circle is exactly half of a circle, the straight horizontal center line acts as a built-in baseline—telling your pencil exactly where to start curving and where to stop so your drawing never ends up crooked.
Alternative Semi-circle Guide
When we make bookmarks in class, drawing perfect curves can be tricky. A compass or a circle template is the best tool to use. These tools help you draw exact shapes every time.
But if you do not have them, you can use everyday objects instead.
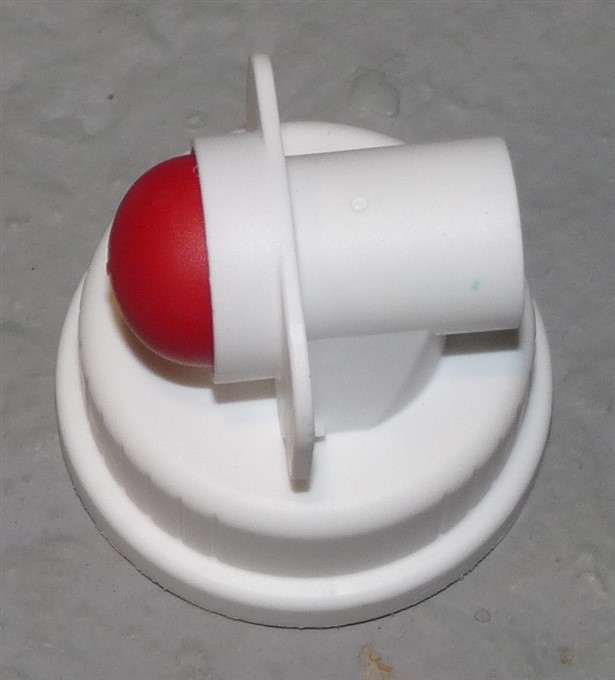
A great choice is the top of a liquid Tide laundry cap. This plastic cap has a wide, round shape just like a circle template. It is also big and very easy to hold still with your fingers. You can just trace around half of the cap to make your two semi-circles.
Using a laundry cap is a fun way to solve problems. It shows that you can think like a real engineer by using what is around you. Just press down hard on the cap so it does not move while you draw.
But if you do not have them, you can use everyday objects instead.
A great choice is the top of a liquid Tide laundry cap. This plastic cap has a wide, round shape just like a circle template. It is also big and very easy to hold still with your fingers. You can just trace around half of the cap to make your two semi-circles.
Using a laundry cap is a fun way to solve problems. It shows that you can think like a real engineer by using what is around you. Just press down hard on the cap so it does not move while you draw.