





Making the Bookmark
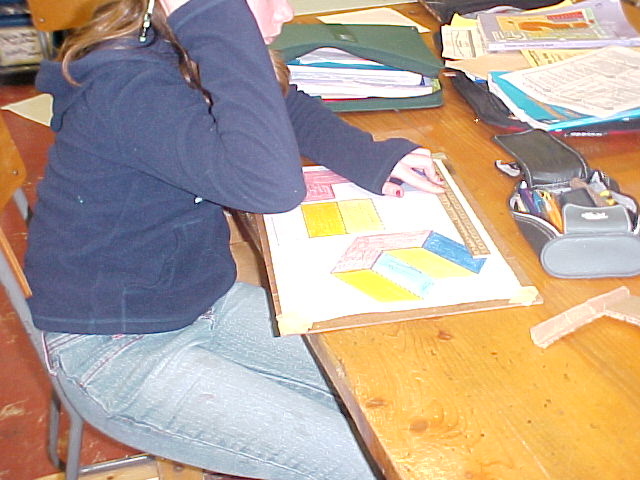
Using a ruler, pencil and scissors is a Super Power!
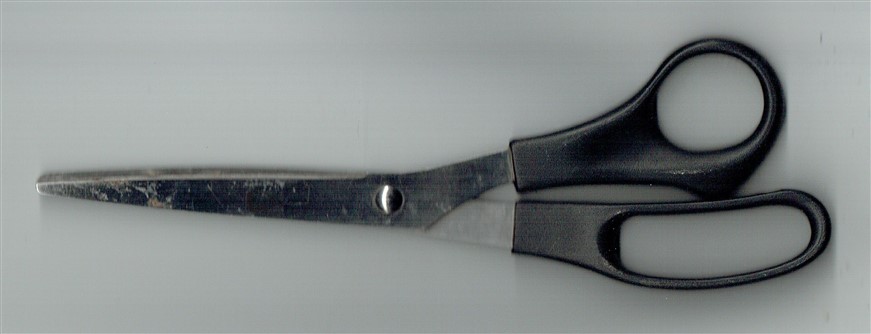
Boom! Using a ruler, scissors and a pencil isn’t just for art class—it is a literal superpower for your brain!
Whether you want to build a bookmark, a bottle rocket, or engineer a super-structure, these three simple tools are your ultimate secret building weapons.
Here is why mastering them turns you into a real-life superhero:
1. It Levels Up Your Brain-Body Connection
The ultimate teamwork: Holding and using these tools still with your hands is a massive workout for your brain.
2. Finger fitness: It teaches your fingers and mind to work together in perfect harmony, just like a professional piano player or a pro gamer.
3. Steady hands: Regular practice makes your hands super steady, which you will need for sketching art, or handling delicate gear in science experiments.
4. It Unlocks the Power of Science and Engineering. Absolutely no rushing allowed: In advanced math, science and technology, being off by just one single millimeter can make a whole project collapse.
5. Super focus: Slowing down to double-check your measurements and cutting straight lines makes your final projects look incredibly neat, clean, and professional.
6. Epic pride: Taking your time means you get to step back, look at your creation, and say, "Wow, I made that to perfection!"
7. It Turns Boring Math into Real-World Magic.
Seeing is believing: You aren't just hearing about boring math words like area and perimeter anymore. You feel it; you see it; you understand it.
8. Hands-on building: You are physically creating those shapes and spaces with your tools and your own two hands.
9. Pro skills: This is the exact way that architects design skyscrapers, builders construct massive bridges, and video game developers map out virtual worlds!


Before you cut anything, look closely at your cereal box and notice that it is a rectangular prism.The front and back panels are the largest parts of the box, giving you the most material for your projects.
You can use the skinny side panels for smaller parts, but you should recycle the top and bottom flaps since they usually have sticky glue on them.
Cereal boxes are made of boxboard, which is just thin, stiff cardboard held together by glue along flat seams called tabs. To safely turn this 3D shape into a flat sheet, gently slide your finger under the top and bottom flaps to pop them open.
Next, find the side seam where the edges are glued together, and use scissors to cut straight down that line. Finally, flatten the entire box out on your table so it is ready for your project.
You can use the skinny side panels for smaller parts, but you should recycle the top and bottom flaps since they usually have sticky glue on them.
Cereal boxes are made of boxboard, which is just thin, stiff cardboard held together by glue along flat seams called tabs. To safely turn this 3D shape into a flat sheet, gently slide your finger under the top and bottom flaps to pop them open.
Next, find the side seam where the edges are glued together, and use scissors to cut straight down that line. Finally, flatten the entire box out on your table so it is ready for your project.


Cutting Your Boxboard
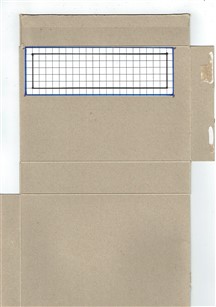
First, look closely at the small photo showing the inside of the cereal box.
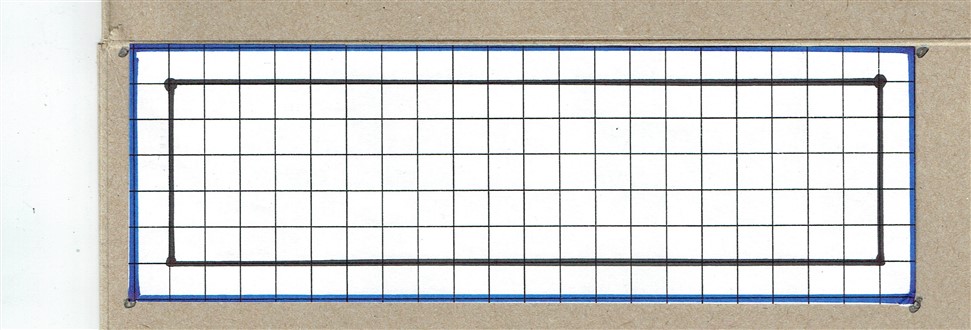
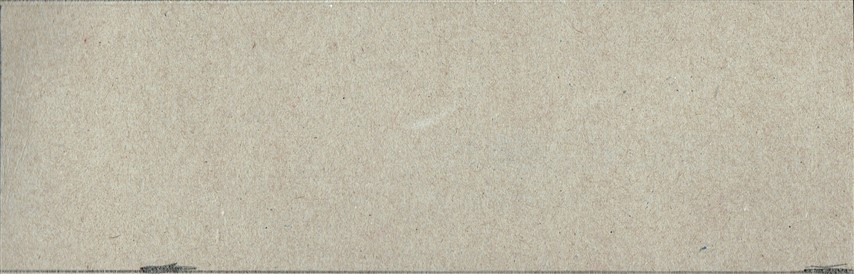
Then, check out the second, larger photo. This zoomed-in picture shows exactly how to place your paper plan and its extra outer edge, called the margin, perfectly along the seam of the boxboard. Notice the four corner points, or vertices, that are marked clearly with a heavy pencil point.
Now, it is your turn to try it. Find a larger piece of boxboard or an empty, flattened boxboard and use your scissors to cut along one of its long edges so you can spread the boxboard completely flat. Place your paper plan carefully right against one of the clean edges of the boxboard. Hold it firmly with your fingers spread out evenly.
Next, use your pencil to make a bold mark at each of the four corners. Once you remove your paper plan, use a ruler to draw straight lines that connect those four pencil marks together. This forms the outline, perimeter, of your material. Finally, take your scissors and carefully cut along those straight lines to finish cutting your piece of boxboard.
First, look closely at the small photo showing the inside of the cereal box.
Then, check out the second, larger photo. This zoomed-in picture shows exactly how to place your paper plan and its extra outer edge, called the margin, perfectly along the seam of the boxboard. Notice the four corner points, or vertices, that are marked clearly with a heavy pencil point.
Now, it is your turn to try it. Find a larger piece of boxboard or an empty, flattened boxboard and use your scissors to cut along one of its long edges so you can spread the boxboard completely flat. Place your paper plan carefully right against one of the clean edges of the boxboard. Hold it firmly with your fingers spread out evenly.
Next, use your pencil to make a bold mark at each of the four corners. Once you remove your paper plan, use a ruler to draw straight lines that connect those four pencil marks together. This forms the outline, perimeter, of your material. Finally, take your scissors and carefully cut along those straight lines to finish cutting your piece of boxboard.
Moving From a Designer to an Artisan

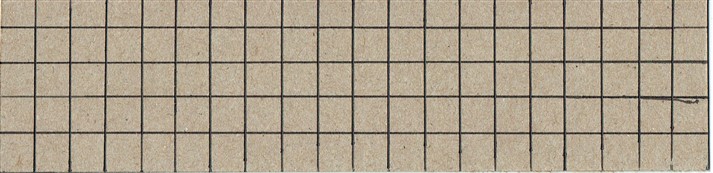
Boxboard cut to size ready to use to make your bookmark
Inside a cereal box
Transferring Your Plan
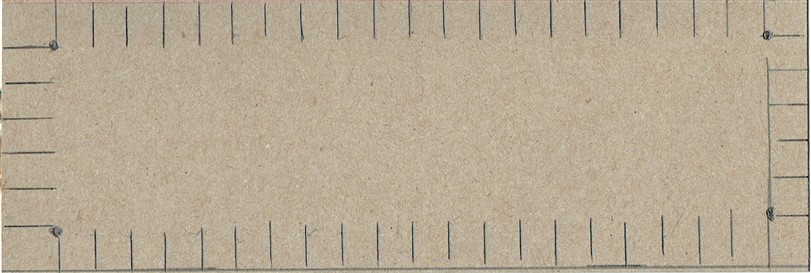
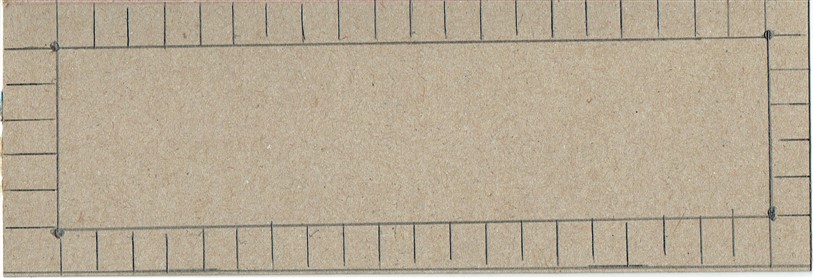
We are now going to focus on physical point transfer and line layout. By doing this exercise, you will learn the secret connection between a flat 2D drawing and a real, 3D object. Taking our time on this project will help us increase our fine-motor precision skills, learn how to keep paper perfectly lined up, and understand a cool engineering concept called "projection." To make sure your project is foolproof and precise, we will start with a reversed-tape loop trick. This invisible tool stabilizes your work so you can focus entirely on using your rulers to track reference points without your paper slipping around.
We are now going to focus on physical point transfer and line layout. By doing this exercise, you will learn the secret connection between a flat 2D drawing and a real, 3D object. Taking our time on this project will help us increase our fine-motor precision skills, learn how to keep paper perfectly lined up, and understand a cool engineering concept called "projection." To make sure your project is foolproof and precise, we will start with a reversed-tape loop trick. This invisible tool stabilizes your work so you can focus entirely on using your rulers to track reference points without your paper slipping around.
Step 1: Taping and Anchoring Your Plan
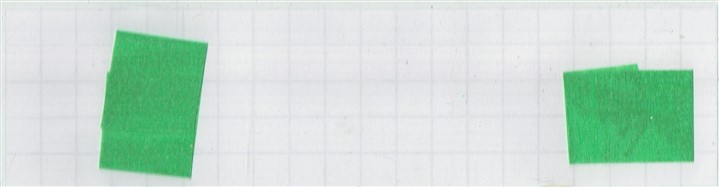
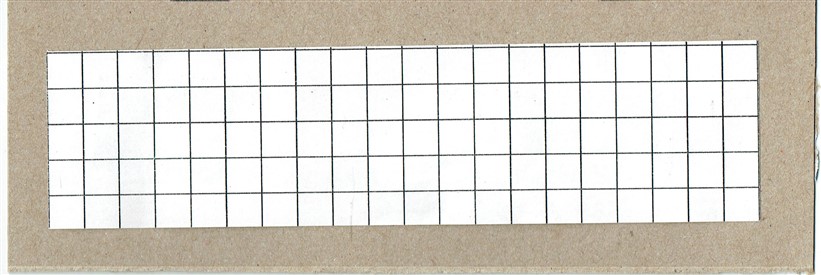
Now that you have flattened your boxboard and cut your rough material, it is time to secure your paper plan. Take two short pieces of green painter's masking tape, cut them neatly with scissors, and roll them into loops with the sticky sides facing out. Place these tape loops onto the back of your paper plan, then carefully center and lay your plan onto the boxboard. Press down firmly. This hidden tape acts like an extra pair of hands, anchoring your plan securely in place so you can use both of your hands to measure and draw without anything shifting.
Now that you have flattened your boxboard and cut your rough material, it is time to secure your paper plan. Take two short pieces of green painter's masking tape, cut them neatly with scissors, and roll them into loops with the sticky sides facing out. Place these tape loops onto the back of your paper plan, then carefully center and lay your plan onto the boxboard. Press down firmly. This hidden tape acts like an extra pair of hands, anchoring your plan securely in place so you can use both of your hands to measure and draw without anything shifting.
Step 3: Marking and Connecting Your Transfer Points
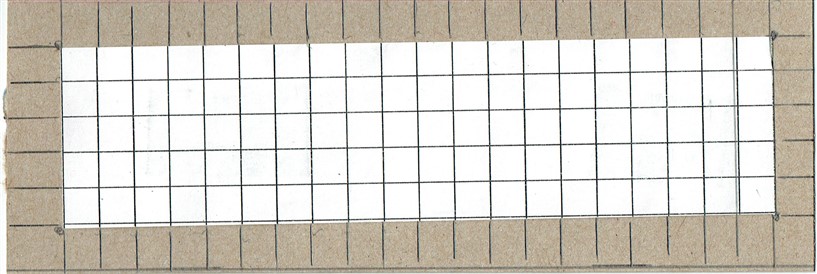
Now, look closely at the specific intersection points where your layout lines cross on the plan. Use your sharp pencil to press a small, clear dot directly on the boxboard right where those projection lines meet. Once you have transferred all your main reference points, you can carefully peel up your paper template. Your tape loop will release easily without ripping the board. Finally, use your ruler to connect the dots on your boxboard, re-creating the exact shape from your paper. You have just successfully transferred a 2D
Now, look closely at the specific intersection points where your layout lines cross on the plan. Use your sharp pencil to press a small, clear dot directly on the boxboard right where those projection lines meet. Once you have transferred all your main reference points, you can carefully peel up your paper template. Your tape loop will release easily without ripping the board. Finally, use your ruler to connect the dots on your boxboard, re-creating the exact shape from your paper. You have just successfully transferred a 2D
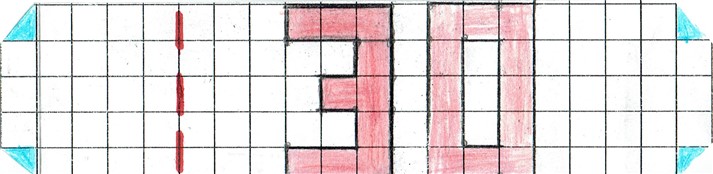
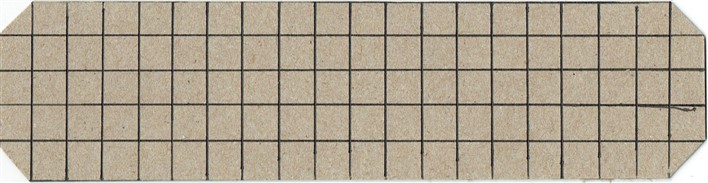
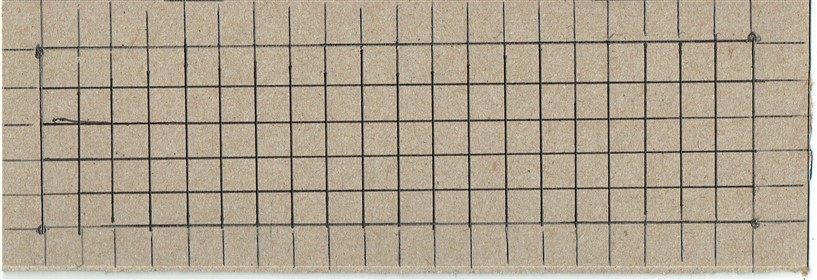
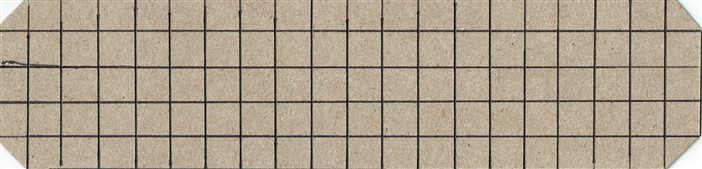
The last step is to design and colour your personal class number using the one centimeter grid as your guide and pencil crayons as your colour median.
When you use high-quality colored pencils on your boxboard bookmarks, you are actually acting like real scientists. Markers use wet ink that gets soaked up by the cardboard, making the edges look fuzzy and blurry. This extra wetness can also make your flat bookmark warp, bend, and twist as it dries.
Colored pencils use dry wax or oil to stick to the surface, which keeps your bookmark perfectly flat, keeps your colors bright for a long time, and stops them from fading in the sun.
Using colored pencils is also a great way to practice your math skills, like precision and geometry. Marker tips are thick and blunt, which makes it really hard to draw tiny details or perfect patterns.
You can sharpen colored pencils to a super fine point to map out exact lines and cool geometric shapes. Plus, by changing how hard you press down on the pencil, you can create smooth shading that makes your artwork look like it has real depth and 3D space. You can notice the difference between the 3 and 0.
Finally, colored pencils help you build better control over your tools, just like an engineer. Marker tips glide too fast on cardboard, making it easy for your hand to slip. Colored pencils give you just the right amount of friction, which gives your fingers better control over your drawing. Best of all, while markers get muddy and gross when you mix them, colored pencils let you layer different colors on top of each other so you can invent your own brand-new shades.
When you use high-quality colored pencils on your boxboard bookmarks, you are actually acting like real scientists. Markers use wet ink that gets soaked up by the cardboard, making the edges look fuzzy and blurry. This extra wetness can also make your flat bookmark warp, bend, and twist as it dries.
Colored pencils use dry wax or oil to stick to the surface, which keeps your bookmark perfectly flat, keeps your colors bright for a long time, and stops them from fading in the sun.
Using colored pencils is also a great way to practice your math skills, like precision and geometry. Marker tips are thick and blunt, which makes it really hard to draw tiny details or perfect patterns.
You can sharpen colored pencils to a super fine point to map out exact lines and cool geometric shapes. Plus, by changing how hard you press down on the pencil, you can create smooth shading that makes your artwork look like it has real depth and 3D space. You can notice the difference between the 3 and 0.
Finally, colored pencils help you build better control over your tools, just like an engineer. Marker tips glide too fast on cardboard, making it easy for your hand to slip. Colored pencils give you just the right amount of friction, which gives your fingers better control over your drawing. Best of all, while markers get muddy and gross when you mix them, colored pencils let you layer different colors on top of each other so you can invent your own brand-new shades.
Bookmark Reflections
Question 1: Linear Length
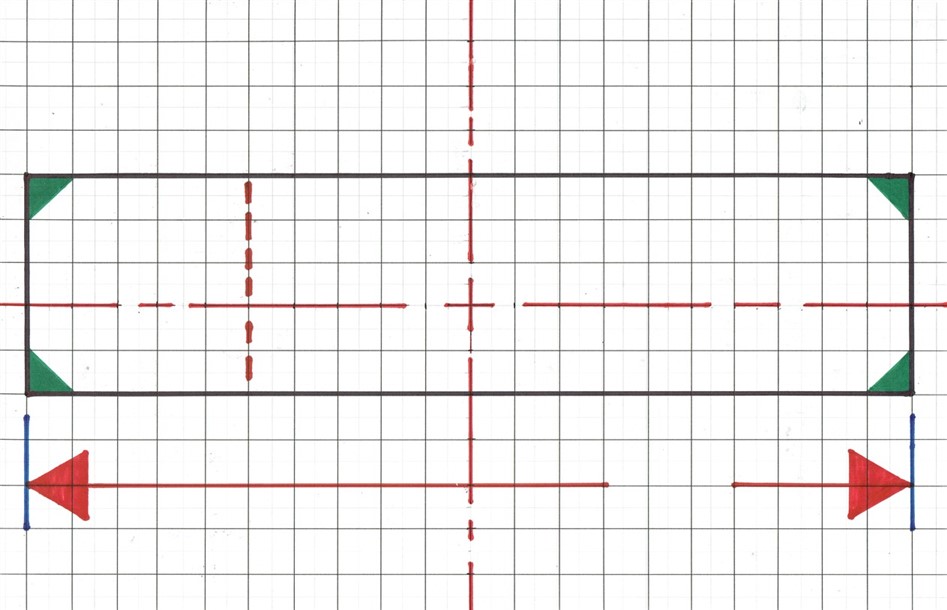
Look closely at the blueprint of your bookmark. Find the total length of the material in centimeters (cm), then convert it into millimeters (mm). Next, find the total width in centimeters (cm) and convert it into millimeters (mm). Write both sets of numbers on your math sheet.
Question 2: Total Surface Area
Imagine your bookmark is a perfect rectangle before the corners are cut. Use the 1cm square grid to help you calculate the total surface area of this untrimmed rectangle in square centimeters .
Part A: How many square millimeters of boxboard is this?
Bonus Challenge: Can you write this total area in square decimeters?
Question 3: Standard Perimeter
Before cutting the corners, we need to trace the outer edge of our bookmark. Calculate the perimeter of the bookmark as a perfect 20cm × 5cm rectangle. Give your final perimeter answer in centimeters (cm), millimeters (mm), and decimeters (dm).
Question 4: The Master Artisan Challenge
Now for the ultimate design test: the miter corner cuts! We are cutting off all four corners to make diagonal, slanted edges. The exact length of each new diagonal line is 14mm.
What is the total perimeter of the finished bookmark, including all four slanted edges and the remaining straight edges? Give your final answer in millimeters (mm), centimeters (cm), and decimeters (dm).
Look closely at the blueprint of your bookmark. Find the total length of the material in centimeters (cm), then convert it into millimeters (mm). Next, find the total width in centimeters (cm) and convert it into millimeters (mm). Write both sets of numbers on your math sheet.
Question 2: Total Surface Area
Imagine your bookmark is a perfect rectangle before the corners are cut. Use the 1cm square grid to help you calculate the total surface area of this untrimmed rectangle in square centimeters .
Part A: How many square millimeters of boxboard is this?
Bonus Challenge: Can you write this total area in square decimeters?
Question 3: Standard Perimeter
Before cutting the corners, we need to trace the outer edge of our bookmark. Calculate the perimeter of the bookmark as a perfect 20cm × 5cm rectangle. Give your final perimeter answer in centimeters (cm), millimeters (mm), and decimeters (dm).
Question 4: The Master Artisan Challenge
Now for the ultimate design test: the miter corner cuts! We are cutting off all four corners to make diagonal, slanted edges. The exact length of each new diagonal line is 14mm.
What is the total perimeter of the finished bookmark, including all four slanted edges and the remaining straight edges? Give your final answer in millimeters (mm), centimeters (cm), and decimeters (dm).